Setting Up a Local Proxy with Docker and NginX Proxy Manager
Following on my previous posts about DNS setup and SSL certificates, here’s how to tie it all together with a local proxy that makes your development workflow way smoother.
When you’re building distributed systems, you’re juggling multiple services locally: databases, message queues, caches, and your actual application. Instead of remembering localhost:5432, localhost:15672, localhost:8080, a proxy lets you use domain names like postgres.localdev.me and rabbit.localdev.me. It’s closer to how production works and honestly easier to manage.
I use Docker for this (though Podman works too), combined with NginX Proxy Manager to handle the routing.
Here’s my typical local development stack:
networks:default:name:local-dev
volumes:sql:couchbase:portainer-vol:rabbitmq-data:rabbitmq-log:postgres_data:
services:postgres:image:postgres:18-alpinecontainer_name:postgresrestart:unless-stoppedhostname:postgres.localdev.meports:-5432:5432volumes:-postgres_data:/var/lib/postgresql/data-./postgres/docker-entrypoint-initdb.d:/docker-entrypoint-initdb.denvironment:POSTGRES_USER:"$DB_ADMIN_USER"POSTGRES_PASSWORD:"$DB_ADMIN_PASS"
rabbitmq:image:rabbitmq:4.2.3-management-alpinecontainer_name:rabbitmqprofiles: [extra]restart:unless-stoppedhostname:rabbit.localdev.meenvironment:RABBITMQ_DEFAULT_USER:"${DEFAULT_USER:-}"RABBITMQ_DEFAULT_PASS:"${DEFAULT_PASS:-}"ports:-5672:5672-15672:15672volumes:-rabbitmq-data:/var/lib/rabbitmq-rabbitmq-log:/var/log/rabbitmq
couchbase:image:couchbase:community-8.0.0container_name:couchbaseprofiles: [extra]restart:unless-stoppedhostname:couchbase.localdev.meports:-8091-8097:8091-8097-11210:11210-18091-18095:18091-18095-18096:18096-18097:18097volumes:-couchbase:/opt/couchbase/var
nginx-manager:image:jc21/nginx-proxy-manager:2.13.7container_name:nginx-managerrestart:unless-stoppedhostname:proxy.localdev.meports:-80:80-81:81-443:443volumes:-./nginx-manager-data:/data-./letsencrypt:/etc/letsencrypt
pgadmin:image:dpage/pgadmin4:9.12.0container_name:pgadminrestart:unless-stoppedhostname:pgadmindepends_on: [postgres]volumes:-./pgadmin4/servers.json:/pgadmin4/servers.jsonenvironment:PGADMIN_DEFAULT_EMAIL:"${DEFAULT_EMAIL:-}"PGADMIN_DEFAULT_PASSWORD:"${DEFAULT_PASS:-}"
portainer:image:portainer/portainer-ce:2.38.0-alpinecontainer_name:portainerprofiles: [extra]restart:unless-stoppedhostname:portainer.localdev.meprivileged:trueports:-9000:9000-9443:9443volumes:-/var/run/docker.sock:/var/run/docker.sock-portainer-vol:/data
The full compose file is available on my GitLab. You can extend this with services like Elasticsearch, Grafana, or whatever else your stack needs.
Each service gets a hostname like postgres.localdev.me or rabbit.localdev.me. The NginX Proxy Manager listens on
ports 80, 81, and 443 and routes incoming requests based on the domain.
Here’s what it looks like in the UI:
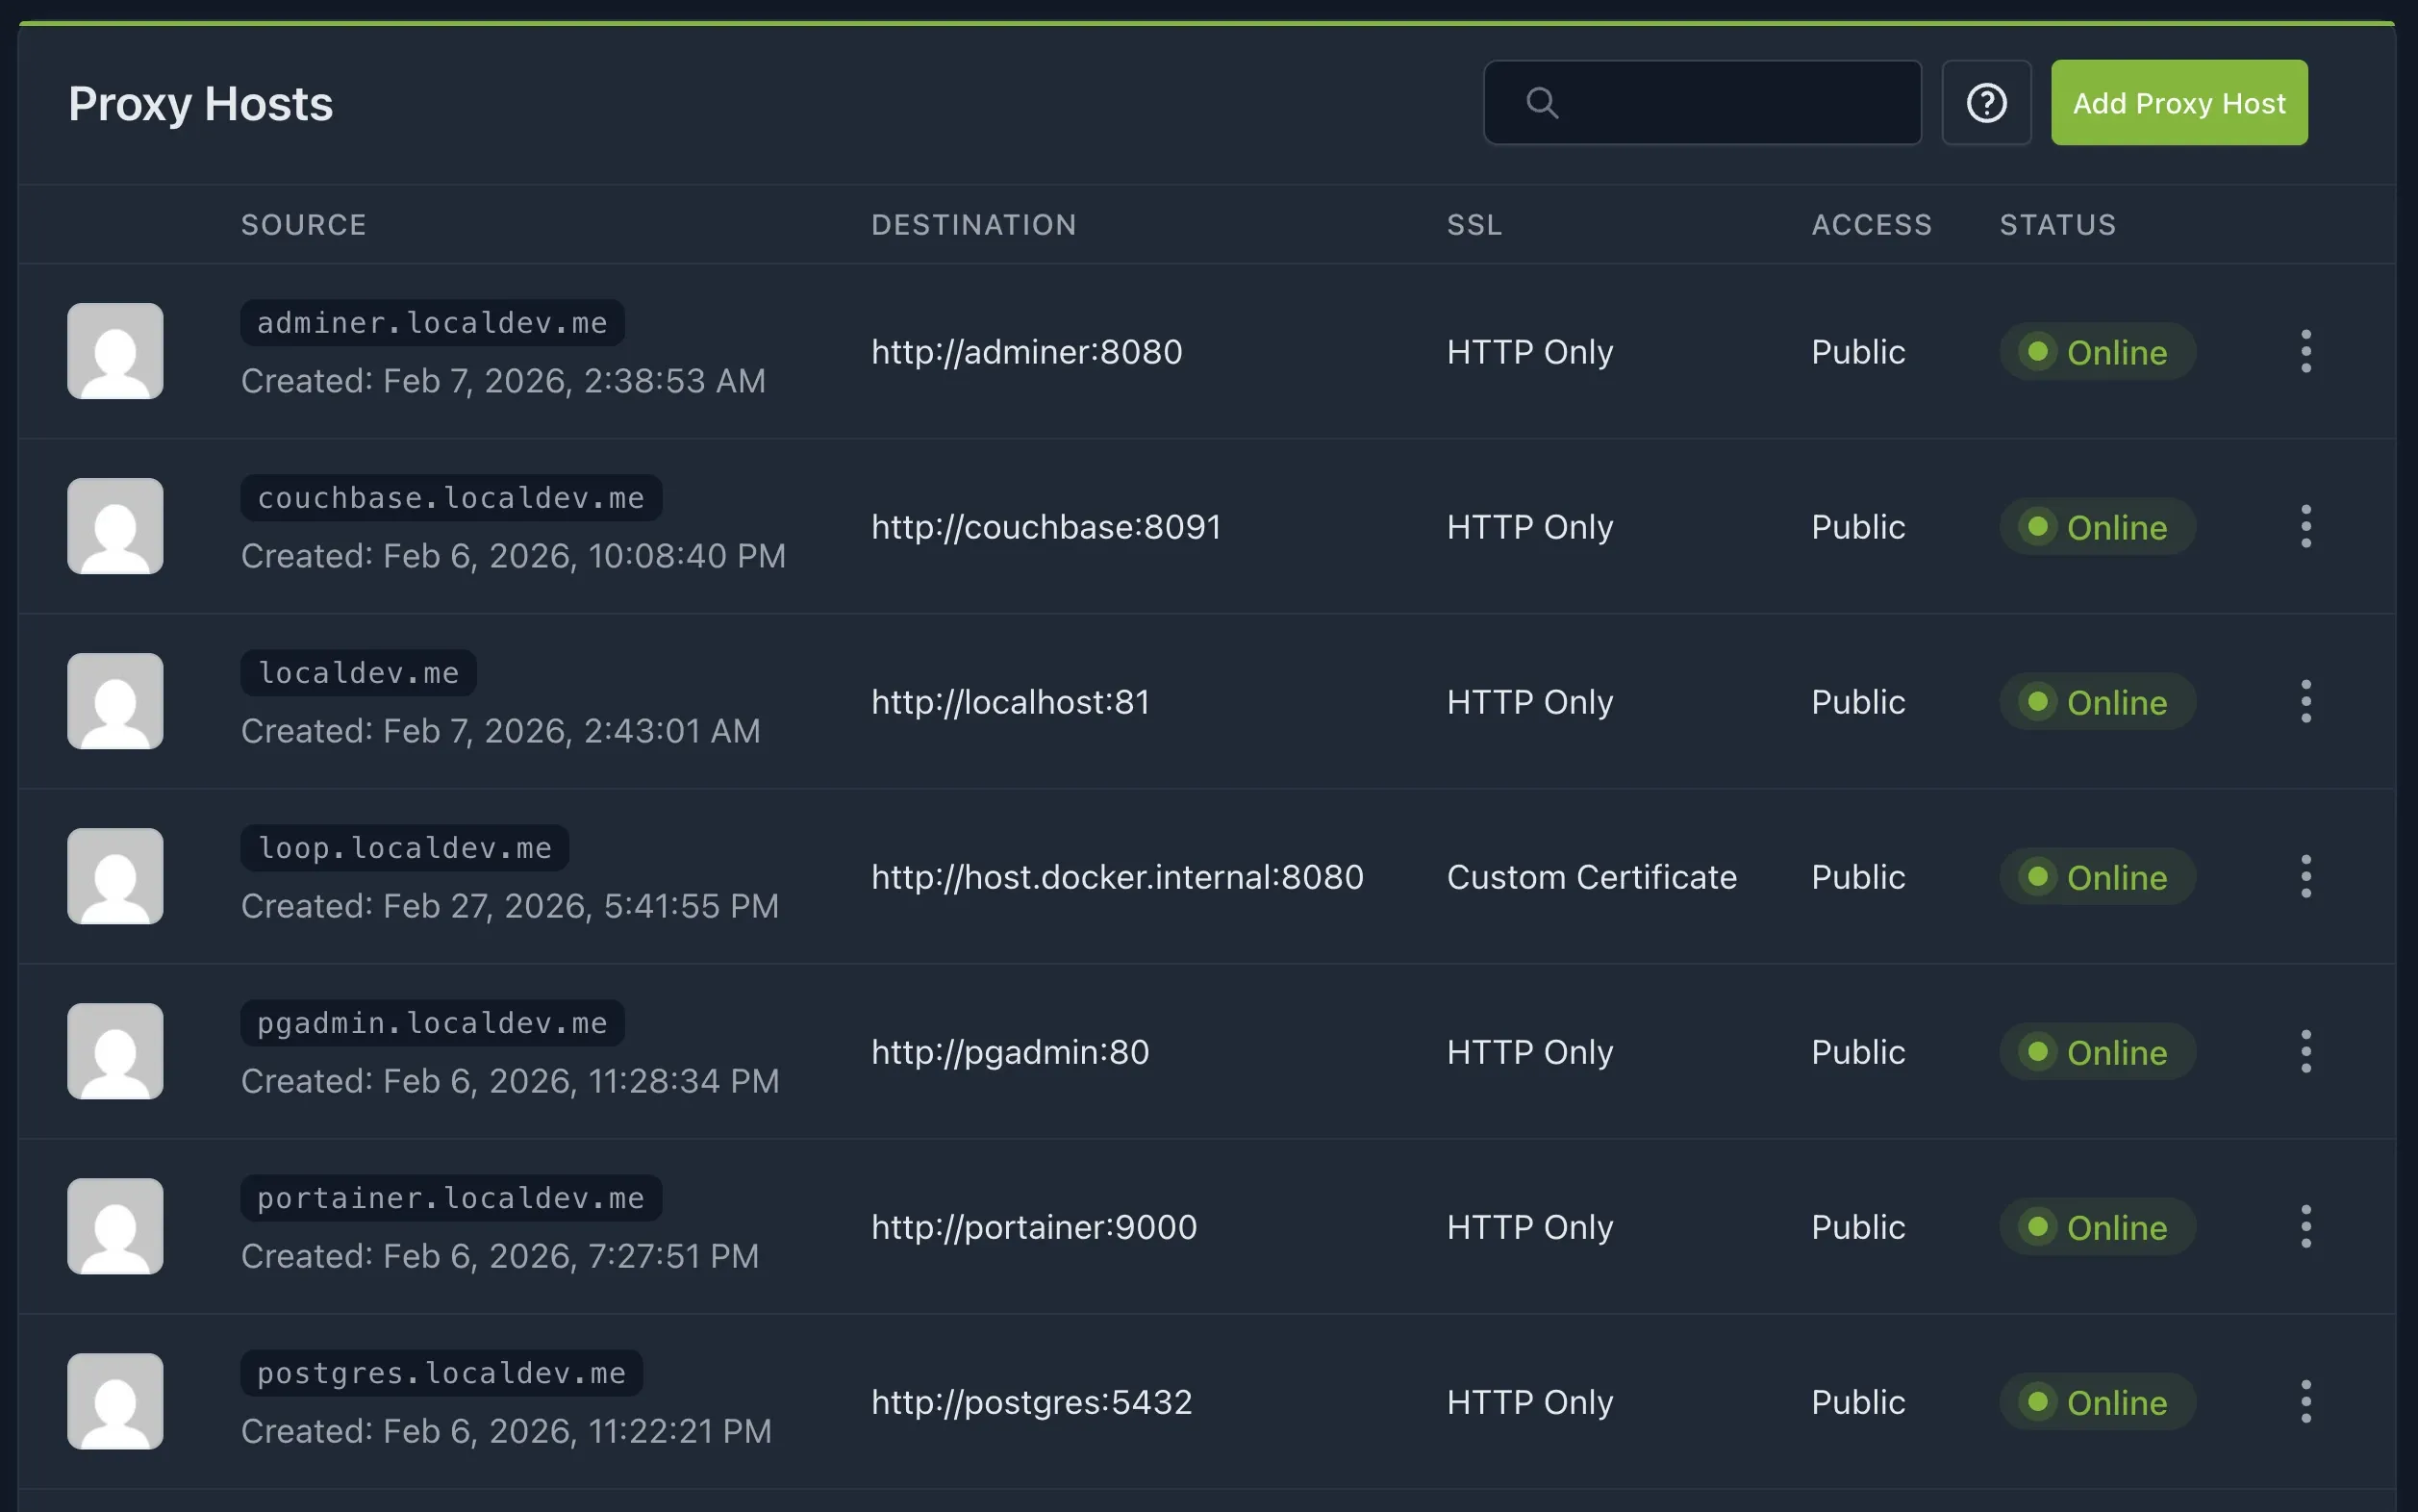
For example, traffic to postgres.localdev.me gets routed to the postgres container on port 5432. My application,
which I run from IntelliJ on localhost:8080, is accessible as loop.localdev.me in the browser. Much easier to
remember than tracking port numbers.
The trick for accessing your host machine from inside Docker is using host.docker.internal as the destination.
That’s how containers reach your localhost without having to know the port.
By checking in the NginX proxy configurations to git, you can track changes and revert if something breaks. Plus, this setup mimics production fairly closely. You’re using domain names, SSL (if you’ve set up certs), and a proper routing layer. It’s a solid workflow for developing distributed systems locally.
Cheers,
Anton
Originally published on Medium: Setting Up a Local Proxy with Docker and NginX Proxy Manager
A step-by-step guide on how to set up wildcard DNS using dnsmasq on macOS, allowing developers to use meaningful local development URLs like couchbase.localdev.me instead of localhost. The setup process includes installing dnsmasq, configuring it, creating a DNS resolver, and verifying the configuration, making local development cleaner and more efficient.
2 min readIn this article we'll generate a key and a root certificate to use in generating other certificates. This can be helpful if you run many applications during development that need ssl certificates. We generate a root certificate so we can trust the root cert once, and all our generated certificates will be honored by our operating system.
4 min readBuilding an MCP server for ResuRank taught me more about macOS code signing and stdout than I bargained for. This is a walkthrough of what broke — DXT distribution killed by Apple's Library Validation, pdf.js corrupting the JSON-RPC channel — and the practical decisions that followed.
7 min read